Fork seals!
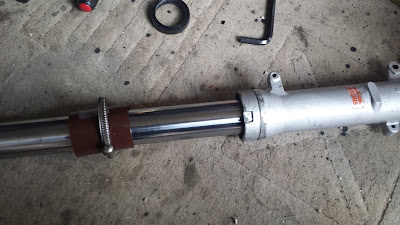
Roger is now in FINAL ASSEMBLY. Spent all morning replacing the forks seals, it was very frustrating until I knocked up the tool below to drive in the bush/seal:
That's a Miniline downpipe connector from Wickes (50mm internal diameter), with around 5mm sliced out of it lengthways (so it can be made a snug fit), with a big jubilee clip. I've looked at a lot of online guides for doing this and it often involves a tool something like the above, but I reckon they concentrate too much on driving in the oil seal - it's actually the guide bushing (below) that needs banging in:
I drove in the bush and back-up ring first - I locked the tool onto the tube, then gently nipped it up in a Workmate. I was then able to use the fork slider like a slide-hammer. Once they were seated (which took some force), I installed the new seal, then put the old seal on top of it to provide some protection:
Then using the slide-hammer technique again, it was fairly easy to drive in the seal (the old seal will almost disappear into leg once it's seated correctly, but you can ease it out with a blunt screwdriver).
With the front end back together, I moved onto completing the drive chain installtion. The link on the new chain was knackered by the duff riveting tool supplied by Wemoto (though they refunded me and sent me a new link FOC). This time I used the Oxford chain tool, borrowed from Chris. It did the job but didn't impress, it's quite fiddly and felt like it was about to break. I reckon it's time to buy a proper workshop quality tool...
And here he is, looking much better with some panels on. Last job this evening was to apply petrol-resistant lacquer to the fuel tank, but it reacted with the coach enamel and I had to rub it down and start again. It's just had a new coat of enamel, but it doesn't look smooth and of course it's the most visible part of the bike... bollocks, I can repaint it over the winter if it annoys me!
My aim is to tide Roger tomorrow... lets see how it goes.


