Cylinder head refurbishment, part 2
Time to remove the head. After I'd removed all the remaining connections (almost forgetting the water temp sensor at the rear and the heater hoses, one of which has a bracket attached to the exhaust manifold), I cracked off the crank pulley bolt using the rope method, which is quick and easy (with a big enough breaker bar, of course). I had to remove the anti-roll bar bolts to get enough clearance for my socket. Next was the cambelt removal. I'm not going to detail that, a good guide can be found here. I like to mark up the belt and pulleys with paint (if I was fitting a new belt I'd transfer these markings to the new belt, but this one has only done about 10K). As the cam pulleys will be coming off, I've marked those too (each is identical with E and I markings, highlight the appropriate one).
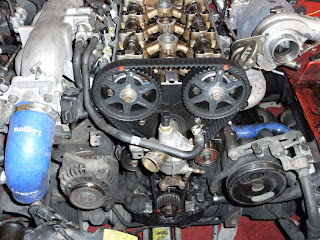
With the belt removed, the head bolts were next. Working in a circular motion (each end of the engine first, working towards the centre), I loosened each bolt 1/4 turn, until all were loose. I think I should really replace these, no doubt they're expensive though. I recruited Mrs B to help lift the head off (it's very heavy with both manifolds attached), she managed to squash her finger somehow and it was my fault.

I've removed the exhaust cam for a bit of a poke about (a simple case of removing the caps - these must be kept in order though, and note the orientation markings on them). Some of the valve lifters don't seem to have any 'give', I'll have to check if this is normal behaviour.


